With the tidewater sportscar club. A very relaxed group, their track days are available either as a single day or weekend, which is nice.
Track Attack Link : track attack
C+, The other + is for my attitude
With the tidewater sportscar club. A very relaxed group, their track days are available either as a single day or weekend, which is nice.
Track Attack Link : track attack
The default setting from Lotus is to use the central hole (out of 5). My Lotus came (from the PO) with the sway bars on the hardest setting (the hole closest to the bend).
The key thing is to have the car on stands – both wheels need to be in the air at the same time to avoid putting load on the sway bar.

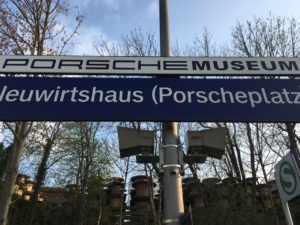
Anyone taking a business trip to Germany can probably get to the Porsche Museum on Sunday if you arrive before midday at Frankfurt Airport. There are lockers at the museum, and the staff there were happy for me to stash my carry-on wheelie luggage behind the desk.
I spent almost three hours there, mostly because I took the audio tour (free) and looked at almost every artifact. The museum gift shop is a bit limited but OK.

My current terminal “Terminator” does not seem to adhere to the theming – or anything much for that matter, but gnome-terminal does.
Terminator’s use of tiling is probably redundant with i3 and tmux, so will switch to gnome-terminal (by changing i3-sensible-terminal to gnome-terminal in ~/.config/i3/config.
gnome-terminal inherits the font and themeing from gtk. Apparently (u)rxvt is more customizable/has plugin ecosystem, but I don’t think I need a plugin-ecosystem. Such things are probably best left to vim and shell.
fontawesome – unicode cut/paste.
http://fontawesome.io/cheatsheet/
Worked through this video tutorial, which had some great hints for making nice fonts appear in Linux. Previously, I could only seem to get decent fonts in Ubuntu, and for other reasons (primarily Nutanix CVM is based on CentOS) I wanted to use CentOS as my desktop.
The two things which had most impact on font appearance were
Both are described in the Tutorial
Another nice idea from the series is to match, or at least give some thought to the Browser (Firefox) window manager (i3) and GTK “Themes”. The tutorial uses a single colorscheme across all elements to achieve a nice coherent look and feel. Doing so has given me the ability to customize/use a lightweight window manager, but still retain nice fonts in the applications, browser and Windowing environment.
On a MacBook Pro, with OSX, after installing a 3rd party SSD, there is no option to issue a “Secure Erase” and only “Format” is offered. After formatting the drive (prior to selling the MacBook) – I was able to recover hundreds of photos and other documents using this freeware tool. Test Disk. Run the tool as “photorec” to access the Photo Recovery features.
To get around this I overwrote the partition with /dev/random. Since the /dev/random device is bounded by CPU – you’ll want to stop the Mac from sleeping during the process by issuing
sudo systemsetup -setcomputersleep Never


Before formatting, there are lots of personal family photos that are recoverable by anyone who goes looking. After formatting, the only images available are the default graphics put onto disk during OS-X install.
Interesting thoughts from Tim Bray. https://www.tbray.org/ongoing/When/201x/2017/02/18/Geek-Career-Paths
And also this, on being a distinguished engineer – or in fact any sort of engineering leader.
On the Myth of the 10X Engineer and the Reality of the Distinguished Engineer
Bleed for this. 11/26/2016 at Southpoint Durham.

